Showing posts with label ohhh lulu. Show all posts

Just call me Ariel

December 31, 2015

I'm so freaking proud of this make. It's far from perfect but it still doesn't take away from the fact I made my own bikini (and that I wore a bikini!) and finally got the fit of the Boylston nailed!

So, I'd like to introduce you to me Mermaid Bikini, I think the reason behind the name is fairly obvious :).
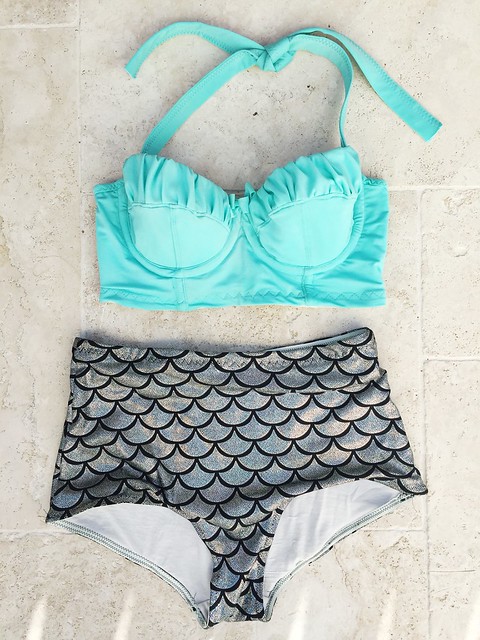
Mermaid Bikini

I'm so in love with it. The top is a modified Boylston Bra by Orange Lingerie and the bottoms are Ava High Waisted Panties by Ohhh Lulu. This is only my second Boylston but I'm happy to report I think I've iron out most of the cup fit issues on this one which will make subsequent bras even better! 
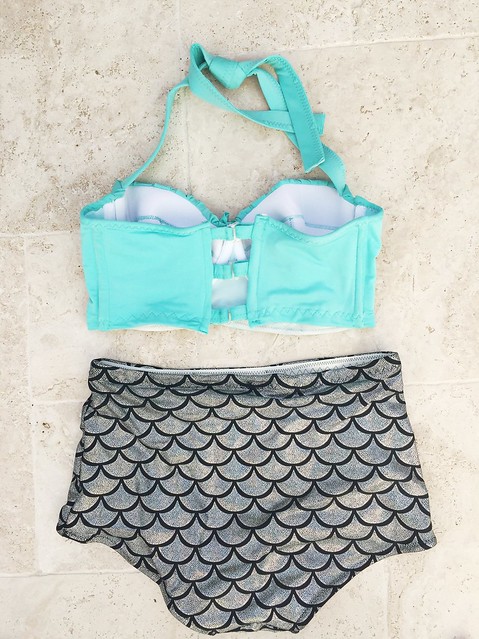
Mermaid Bikini

Most of the fabric, elastics and notions are from Spotlight. The Lycra for the top was a remnant I picked up for $2/m (seriously I couldn't leave it behind for that price!) and the Lycra for the bottoms I'd had my eye on for a while before I took the plunge. I'd fallen in love with the idea of a longline and high waisted bikini since seeing this one by Emerald Erin. Having worn it now I love the extra coverage it gives while still being a bikini.
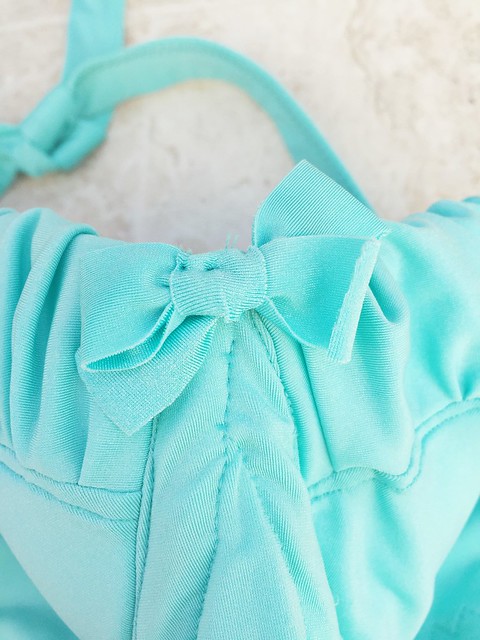
Mermaid Bikini

The major alterations I made to this Boylston (as compared to my last) were to alter the upper cup peice to remove some fabric, I had experienced some gaping in the top cup while the bottom of the cup fitted. Thankfully I think I've corrected this issue now as it would have been more apparent while wearing a bikini and thankfully it wasn't.
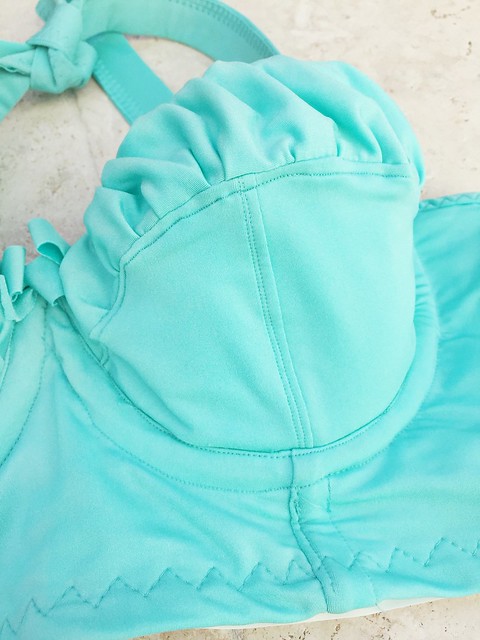
Mermaid Bikini

The more obvious alterations include making that pattern a longline and ruching the upper cup. These were both relatively simple alterations but I think they make the suit. I read this post and this post by Maddy of Miss Maddy Sews who had altered her Boylston before and they were quite helpful. I also changed the straps to a halter style though this was incredibly straight forward.
Mermaid Bikini

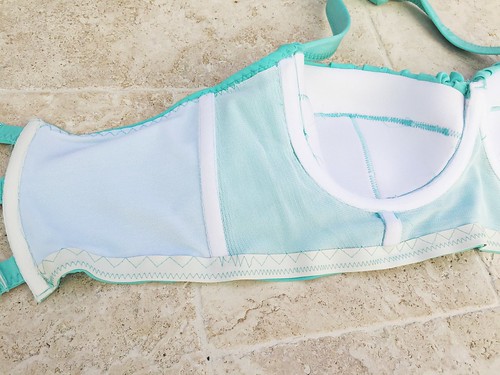
The inside of the bikini top is lined with one way stretch mesh and powernet as you would line a normal bra. The whole process was quite similar, foam cups, underwire, top stitching and so on, the only major difference being the Lycra. Which my machine does not like.
Mermaid Bikini

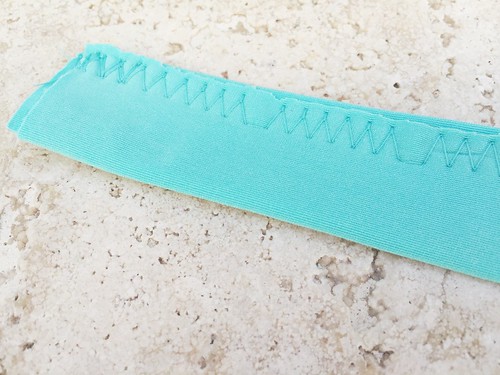
I had major drama with my machine, skipped stitches (as above), birds nests the works! I did everything but change the needle which probably would have solved all my problems. Oh well, live and learn.
Mermaid Bikini

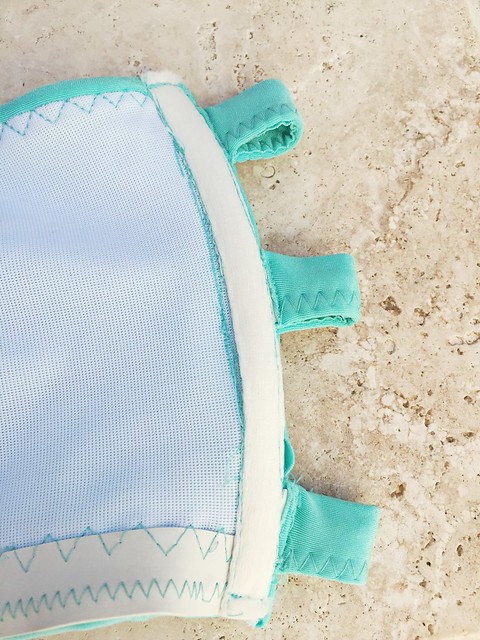
I read Erin's post about her bikini numerous times to try and ensure mine would be as wearable as possible. I followed any hints she gave to the letter, right down to the boning at the back and the three claps. I also used her wonderful tutorial to make the straps and closures.
Mermaid Bikini

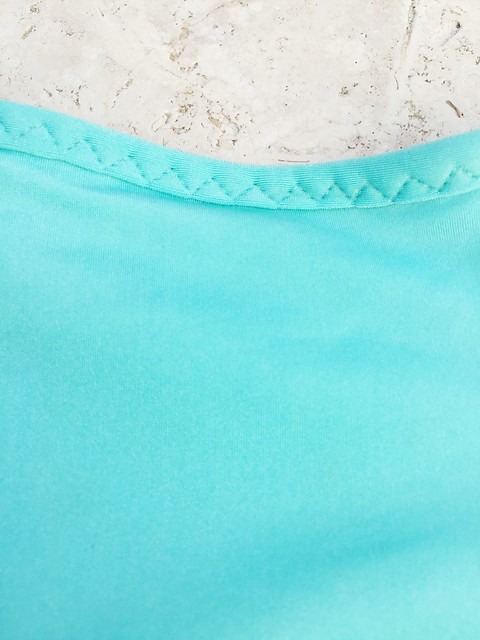
Something that was a little different for me was finishing the top edge with fabric rather than elastic. It's not perfect but it does the job and was fairly easy to apply.
Mermaid Bikini

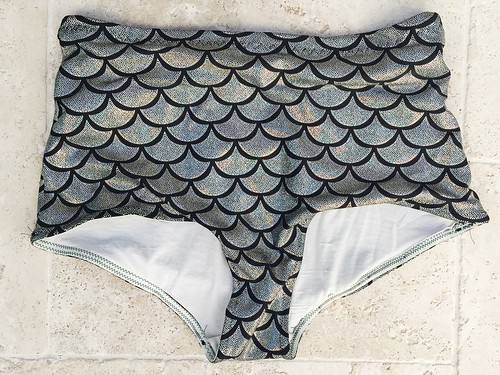
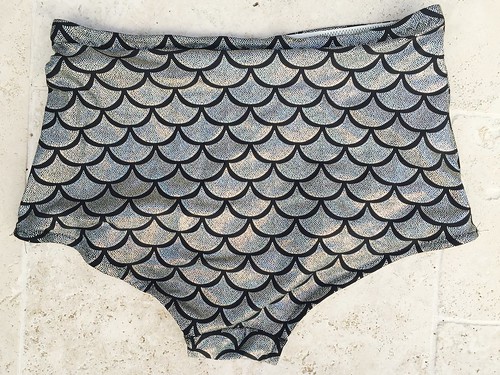
This was the first time I had ever used Ohhh Lulu's Ava pattern, I bought it especially for this project as I didn't wasn't to spend the time altering Betty to  get the seams right. Sometimes it's about working smarter not harder.
Mermaid Bikini

The bottoms are lined with some kind of stretch lining. I'm not really sure it is a swimwear lining but I'm sure it will pass, more of less. The lining also seemed to stretch more the the Lycra so it's a bit frankensteined on the inside. This results in them sitting a bit funny when flat but doesn't effect the wear at all. I used swimwear elastic for the edges and probably should have enclosed it but again, live and learn, there's always the next one!

Anyway, while this may not be my best make of 2015, I think it is the one I'm proudest of. If you had told me a year ago I would have made and worn my own bikini I would have laughed at you, however it just goes to show how much things can change in a year.

I hope you had a wonderful Christmas and have a wonderful start to 2016.

Until next time,

Emma :)

Sequin & Velvet Bra Collection

October 13, 2015

Sequins & Velvet Bra Collection

I'm just going to start by sating I love this collection.  As in head over heels.  This collections was inspired by this set by Ohhh Lulu.  I had sequins left over from a pencil skirt I made (which I apparently haven't blogged!) and when I stumbled upon Sarah's set on Pinterest I knew I had found its calling.  Then what I found navy stretch velvet on my last trip to East Coast Fabrics it was serendipitous.

Sequins & Velvet Bra Collection

As you can see I made two bras and two sets of knickers with this combination of fabric.  Can you tell I'm a little obsessed?  The bras are a Watson Bra by Cloth Habit and a Jasmine Bralette by Ohhh Lulu and the knickers are Grace and Betty both by Ohhh Lulu.

I had myself psyched up for these being awful to sew, thankfully the process went smoother than I had expected.  I pinned a lot, which is something I never normally do, and I do think it helped.

Sequins & Velvet Bra Collection

Jasmine was the first piece of this set I made.  I find this pattern really easy to sew, I think that its mainly due to the fact there are only four pieces that need to be sewn together to end up with a completed bralette.  

Sequins & Velvet Bra Collection

There were a few more pieces for this Jasmine, purely because I lined the sequins so I could enclose the seams.  Lets face it sequins on skin are scratchy,  To get all the seams enclosed I followed these instructions in the Watson Bikini Sew Along.  Obviously these weren't crotch seams but I've used this method a number of times now and it always pays off.  It gives a much nicer finish than exposed seams.  I didn't enclose the side seams but I'm not too fussed, I don't see this bra being worn all the time, it's definitely not an everyday bra.

Sequins & Velvet Bra Collection

I think this is my favourite Watson to date, but I'm not really sure I want to commit to that.  I mean it's hard to compete with this one and this one. Once again I made my standard 38A, in the longline version, however this one seems a little snug, still wearable, but a little tighter than normal, though I think I know the causes of that.

Sequins & Velvet Bra Collection

I think the snugness of this bra is due to a few factors.  Firstly I removed all give in the front of the bra by lining it with one way stretch mesh.  The bands are also lined with powernet as I did not think the velvet would be able to cope with the constant stretch.  The closure is also only two hooks in length not three and I honestly think that would make all the difference in the world. I plan on changing it when I can get my hands on one.  I have to order them online as no one in town seems to stock them.

Sequins & Velvet Bra Collection

The other change I made with this version in the addition of some boning along the side seams.  I've found my other Watson longline tends to ride up so the addition of boning should prevent this.Thankfully this was an easy addition but I do think it also contributed to the snugness of the band.

Sequins & Velvet Bra Collection

My favourite bit of this bra is the little rosette in the centre.  I think it makes it.

Sequins & Velvet Bra Collection

Grace by Ohhh Lulu was actually the first underwear pattern I bought.  While I've since discovered other patterns I love more this one will always hold a special place in my heart.  I used the same method as I did for the Jasmine Bra to enclose the seams.  The trickiest bit of this whole set was actually attaching the fold over elastic, it really isn't prefect, especially over the sequins but overall I'm still happy with it.

Sequins & Velvet Bra Collection

Until I tried the Watson Bikini I would have sworn Ohhh Lulu's Betty High Waisted Knickers was my favourite underwear pattern.  I think it still is to a degree.  Thankfully these turned out as I had expected and I'm pleased I chose to add them to this set.  I love the feel of high waisted underwear and a longline bra.  I think it might be my favourite combination so there was no way these weren't being included in this collection.

Sequins & Velvet Bra Collection

You probably deserve a medal if you made it to the end of this post.  There were just too many photos and I couldn't pick.  I hope you love this little mix and match set as much as I do.  I can't wait to break it out sometimes.

I now just need to come up with my next epic project.  So far its a quilt for a wedding present in May next year, so I have heaps of time (famous last words!). I'm also keen to try another Marlborough so we will have to see what inspiration hits.

Emma :)

Bra Patterns - Watson Bra by Cloth Habit and a Jasmine Bralette by Ohhh Lulu
Underwear Patterns - Grace and Betty by Ohhh Lulu
Fabric - Sequins about 18 months ago (for $10/m) from Spotlight, Velvet from East Coast Fabrics
Elastics & Hardwear - Stash a mix of Lincraft and Booby Traps

Lavender Days Bra Set

September 4, 2015

Lavender Days

If you've read my blog more than once you would know by now that I'm a fan of Ohhh Lulu, this set is no different.

I found some stretch lace at my local Lincraft, it had a really good stretch that I've been struggling to find however it was only in white.  Thankfully I didn't really see that as a problem and proceeded to dye the fabric and all the elastics for this set.  I used Rit liquid dye in navy and ended up with this colour.  Thankfully I like it!.


Jasmine Bra

I used the Jasmine Bra pattern (I cut a medium) for the bralette.  It really is nice and simple for a lounge bra.  There isn't much support for a lounge bra it isn't really required.  Saying that it's not something I would wear to work though.

I added bows where each of the straps were attached in order to cover up that they don't look the best.  Thankfully I had the ribbon in my stash already.


Jasmine Bra

You can see how well everything dyed and how well it coordinates.  This is not going to be the last time I dye everything for a bra that's for sure.


Alice Knickers

I used Ohhh Lulu Alice Knickers Pattern to make the matching undies.  The pattern stated 90cm was required for these but thankfully due to using stretch lace I was able to get the whole set out of  1/2 a metre.  


Alice Knickers

I used some grey cotton jersey for the gusset, it was close enough to blend as I hadn't thought to dye any.  I used Miss Maddy Sews suggestion and attempted a rolled hem to finish them as I wasn't adding more lace to the edges.  It wasn't disastrous but it sure isn't perfect either.  I'm pretty happy with it as it was the first time in a long time I'd tried a rolled hem.

Overall, I'm pretty happy with these, and even happier I got them the set out of so little fabric!  I'm keen to try a bra with underwires next, I've already ordered some so now I just have to wait til they arrive!

Emma :)

Fabric - Lincraft (Dyed by me)
Elastics - Stash - Mostly Lincraft
Knickers - Alice Knickers by Ohhh Lulu

Ohhh Lulu Emma Romper - Take Two

August 7, 2015

As I had planned last week, I made another Emma Romper out of this fabric.

I am thrilled with how it turned out!  I graded from a medium bust to a large at the hips with this one and it does fit better.  The only other change I made was turning the back straps into a racerback feature.  I used the elastic and trim that I dyed and I am pleased to say I think it turned out quite well.

Anyway enough words to today, its been a loooooonnnnggg week, I'll just leave you with the photos.


Emma Romper

Emma Romper

Emma Romper

Linking up with Crazy Mom Quilts for Finish it up Friday.

How has your week been?

Emma

Ohhh Lulu Emma Romper

July 31, 2015

If you've read before you probably already know I'm a bit of a fan of Sarah from Ohhh Lulu.  A few weeks ago she released a whole bunch of new patterns and I fell in love.

I was head over heels for most of them but especially her Emma Romper, after all we do share a name!  Feminine, relaxed, comfortable are all words I'd use to  describe this pattern.  I'm pleased to report it was a fairly simple pattern to construct (only four pieces to cut out) and it came together pretty quickly.

Emma Romper

I used a stretch crepe I had in my stash to make a muslin from before cutting into this fabric to make another version.  I really love this feel of this fabric, the softness of the crepe is wonderful against your skin.  The pattern does recommend non stretch fabrics to be cut on the bias, but from my experience I prefer undergarments with more stretch rather than less :).

Emma Romper

I cut a medium in the bust and graded to an XL for the hips as per my measurements.  For the next one I intend to only grade to a large as well as alter the pattern slightly to give a little more coverage on the top of the legs, that is purely due to personal preference though.

Emma Romper

The finishing tips Sarah provides in this blog post are wonderful.  I didn't use french seams to construct my garment, or add the gathering to the waist, but it really is worth a read before you get stuck into making your romper.  


Emma Romper

I'm really happy with how this one turned out, especially the little details the lace, fold over elastic and straps add.  I LOVE this strapping, I purchased it from Susan at Measure Twice Cut Once, I really can't recommend her enough :).

I think this romper might be my new favourite pattern, at least till I find another one I love just as much :)

Linking up with Crazy Mom Quilts for Finish It Up Friday.

Do you always use the fabrics the pattern recommends or do you use others too?

Sunday Stash #8 - Mystery Fabric

July 26, 2015

I failed at my attempt at No Buy July!  Lincraft was having a 50% off all fabric sale and I went in to have a look.  Saying that I only spent $15 so that really is still quite successful.

I'd seen the new patterns Sarah at Ohhh Lulu had released and really liked the look of her Emma Romper, after all we share a name :).

Anyway I saw this fabric in Lincraft and knew it would be prefect!


Mystery Fabric

I have no idea what fabric it is and I'm stumped.  It has the texture of a crepe, but its thicker than I've ever seen a crepe.  It seems like it is has a brushed back given how soft it is.  It also has the really generous stretch.  It also had no tag which would be right.

Anyway, I can't wait to see how it turns out!  I'm hoping it will be amazing!

Brigette Bra

July 9, 2015

Continuing the bra making trend from last week, this week I used Ohhh Lulu's Brigette Bra Pattern to make another bra.

I'm going to be totally honest to begin with and say I don't love this one as much as my Jasmine Bra.  I think some of that is to do with the fabric, my Brigette Bra uses proper bra making fabric where as this one just uses what I had in my stash.  I'm going to try it again when I get some better fabric and see how we go.

Brigitte Bra

Saying that I am happy with it.  It still looks nice and while I'm not sure I'll get much use of it on an everyday basis I'll still be able to wear it around the house when not much support is required.

Brigitte Bra

I made a medium as per my measurements, however the elastic I used on the band is not as tight as other lingerie elastics I have used.  I really went for looks over practicality with this one I think.

Brigitte Bra

I'm planning on making a matching pair of undies, sometime soonish hopefully.  I do hope to share something other than a bra with you next week though.

Brigitte Bra

I really like the fact I've learnt plenty from this project.  The first being how to use fold over elastic correctly, the second being the importance of the correct materials for a project.  Overall, even though I'm not entirely satisfied with my finished product, I'm still happy.

I'm also linking up with Crazy Mom Quilts for Finish it up Friday.

What have you learnt when a sewing project didn't work out?

Emma

Ohhh Lulu Jasmine Bra

July 3, 2015

So I actually used the fabric I blogged about in last weeks Sunday Stash.  Let me preface by saying I am in L.O.V.E with the results.

I was really in the mood to sew the other day.  I knew I had no plans and after a very busy week so I got set up in my sewing room with Gilmore Girls playing on my laptop and got stuck in.


Jasmine Bra

Until recently I had never even considered sewing things like bras, undies and lingerie.  I don't know why, they'd just never been on my radar.  I'd seen a few different things on pinterest and they had caught my eye.  However it wasn't until I stumbled across Ohhh Lulu that I was hooked. So far I've made undies using both her Grace and Betty patterns.

Jasmine Bra

I used the Ohhh Lulu Jasmine Bra pattern and honestly can't believe how easy it was.  There were only three pattern pieces, each on a separate page so no taping required.  Plus if you made it unlined you would only need to sew five seams - talk about crazy easy!

Jasmine Bra

I used this bra kit from Susan at Measure Twice Cut Once.  I can't recommend it enough, the fabrics are wonderful and the colour is amazing!

I fully lined my bra with the tricot from the kit, I wanted to give it a bit more structure than just a plain lace bra.  This was still simple enough as I just followed the instructions in the pattern.  Though next time I would make sure that I took more care to ensure that the lining sat better inside the bra.  I feel that in the one I've made the lining is marginally too large, though not enough to stop me being crazy happy with the results.


Jasmine Bra

The details are some of my favourites.  The elastics are brilliantly feminine yet robust enough to survive wear.  The straps have a delicate detail which I love.  

Jasmine Bra

I've got to say it is amazingly comfortable to wear and I now need to make enough to make to have one to wear every day of the week.  Sarah at Ohhh Lulu also released new patterns this week, I think this could be bad for my budget!

Have you ever thought about making a bra or underwear?

Everyone Deserves Pretty Knickers - Betty Knickers

June 9, 2015

As I've mentioned before I'm a little in love with Ohhh Lulu's patterns and creations, I've already used her Grace Knickers pattern a few times before.  This time I used her High Waisted Betty Pattern with some nice results.


Betty Knickers! 

The pattern is similar to Grace in the way that they have panels of stretch on the sides. The major difference being obviously that Betty is high waisted. In the interests of full disclosure  the instructions weren't particularly comprehensive there were enough to work out what needed to be done

I'm going to be completely honest and say I've never own or worn a pair of high waisted undies before but I think I'm a little in love. I probably wouldn't wear them to work everyday but for something a little different these are amazing. I'm actually really digging wearing them under high rise jeans.

Betty Knickers!

For my first pair I used a cotton jersey (given to me by a friend) and mesh for the outer panels. While the fit isn't perfect (I cut an extra large) I'll probably try a Large for the next pair if using stretch fabrics. I'm hoping that that will help with some of the fit issues and make them a little tighter fitting.

Using the cotton for the main panelling feels amazing. I plan on making more than one pair out of this fabric for sure!

Betty Knickers!

I used a Ric Rac elastic around the leg holes and fold over elastic for the first time ever on the waist. I'm not sure I attached the elastic correctly and I stuffed up by putting the join at the front not the back, thankfully a bow distracts from it.

Betty Knickers!

Overall I do recommend this pattern. The fit is good and the high waist is a thumbs up in my book. I'm planning to make many more, especially out of Jersey!

Because Everyone Deserves Pretty Knickers!

June 1, 2015

http://www.measuretwicecutonce.com.au/2015/05/2nd-annual-everyone-deserves-pretty-knickers-week/
 
 
I'm pretty excited about this week!  Susan over at Measure Twice Cut Once is holding her second Everyone Deserves Pretty Knickers Sewing Week!  I'm not going to lie, I'm pretty excited!
 
I recently bought the blue bra making kit from Susan and I can't wait for it to arrive!  Hurry up Australia Post!
 
I'm now just tossing up which pattern I want to use for my first bra, I'm leaning towards either the Jasmine or the Brigitte bralette by Ohhh Lulu.  Though in reality I think both might be the perfect answer! I've already used one of Sarah's pattern before and I found it well written and quite comfy to wear.
 
My plan for this week is to finish up the pile of Grace undies I have that just need hemming/elastic added and then then cracking into my bra.
 
I find the idea of making my own undergarments really quite interesting.  I can indulge my more feminine side and use for trial and error to create things I love.  I'm quite keen to get started!
 
I've included a little collage below of some of the things I've seen around that are inspiring me this week...
  
 
because everyone deserves pretty knickers inspiration
 
A B & C All by Ohhh Lulu D Found on Pinterest
 
 
I'm really digging Sarah's style in case you hadn't noticed ;), I mean a sequined bra and knickers set!  In the interests of full disclosure the top left photo is on its way to me now.  I mean navy lace, resistance was futile!

I also finally added my blog to Bloglovin', you can follow it here.
 
Are you joining in Because Everyone Deserves Pretty Knickers Sewing Week?

Handmade Tuesday #7 - Grace Knickers

March 24, 2015

No dodgy mirror selfie today :)  Instead there is actually no photo of me wearing my handmade creation today.  That's for one simple reason, what I made isn't really meant to be seen by the general population, at least not on my body anyway!

That's because I made some knickers!  I wanted to sew something a bit different and when I came across Ohhh Lulu the other week I knew what it was.  Sarah not only sells her creations through her Etsy store, she also sells patterns on Etsy and Craftsy!  I purchased her Grace Knickers pattern and found them fantastic for someone who has never sewn lingerie before.  To start with there were only 4 pattern pieces and 5 pieces of fabric to cut and I was able to whip up my first pair in no time at all (I didn't time it but I'd say somewhere between 1-2.5hrs from pulling fabric to wearable).


Ohhh Lulu Grace Knickers
 
 
The Grace Knickers have a bias cut woven front and back and stretch sides.  In this pair I used a dot poplin from Spotlight and some stretch lace. They finish with a double needle around the legs and elastic on the waist.  I've cut out about another 5 pairs or so and just need to finish them off before I have enough handmade undies to last the week.
 
Have you ever made any lingerie before?
 
Emma
DESIGNED BY ECLAIR DESIGNS